

How to buy hosting from Namecheap in 2025 is an easy and straightforward process that ensures you get reliable, cost-effective, and efficient hosting services for your website. Whether you’re a newbie just starting with web hosting or someone looking to upgrade their current plan, Namecheap has something to offer for everyone. This article will walk you through the steps to purchase hosting, ensuring you make an informed decision every step of the way.
How to Buy Hosting from Namecheap Complete Guide
How to Buy Hosting from Namecheap: Complete Guide” is your ultimate resource for purchasing web hosting from Namecheap in 2025. This guide will walk you through each step, from selecting the right plan to finalizing your purchase, ensuring a seamless experience
Step 1: Visit Namecheap’s Website
The first step is to visit Namecheap official website at www.namecheap.com. Once you’re on the homepage, you’ll find various hosting plans and services.
Step 2: Explore the Hosting Plans
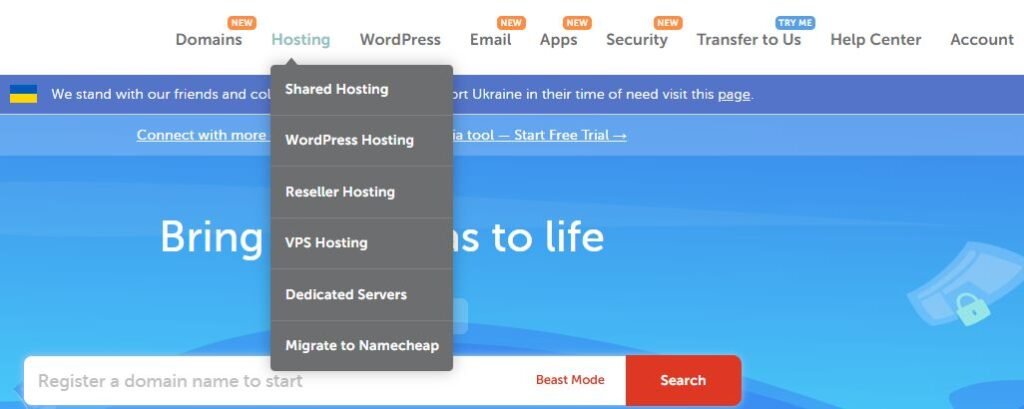
Once you are on Namecheap homepage, locate the “Hosting” tab on the navigation menu. Hovering over it will present you with several options like shared hosting, VPS hosting, dedicated hosting, and more. Each hosting option caters to different needs, so it’s important to know which one suits your website’s requirements.
Step 3: Select a Hosting Plan

Now, you need to choose the hosting plan that best suits your needs. Namecheap offers several hosting options:
Shared Hosting – Ideal for smaller websites or personal blogs.
VPS Hosting – Perfect for websites that require more resources, such as growing businesses.
Dedicated Hosting – Designed for large websites with high traffic and specific server needs.
Select the plan you want and click on “Get Started” to proceed.
Step 4: Choose Your Billing Cycle and Data Center Location
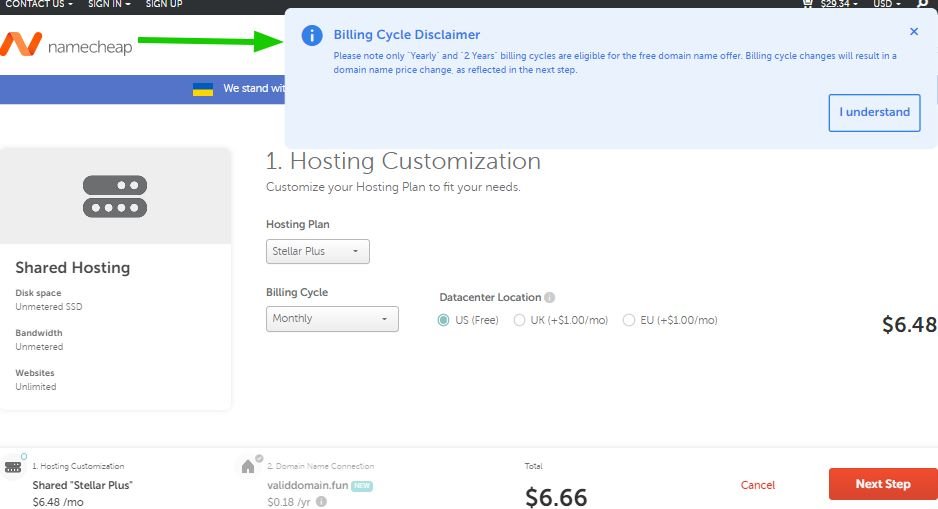
After selecting your plan, you’ll be asked to pick a billing cycle (monthly or yearly). Namecheap provides flexibility in billing, allowing you to choose what works best for you. You’ll also need to choose a data center location, whether it’s in the US, UK, EU, or SG (Singapore). The location you select can impact your website’s load time depending on your target audience.
Step 5: Choose a Domain Name

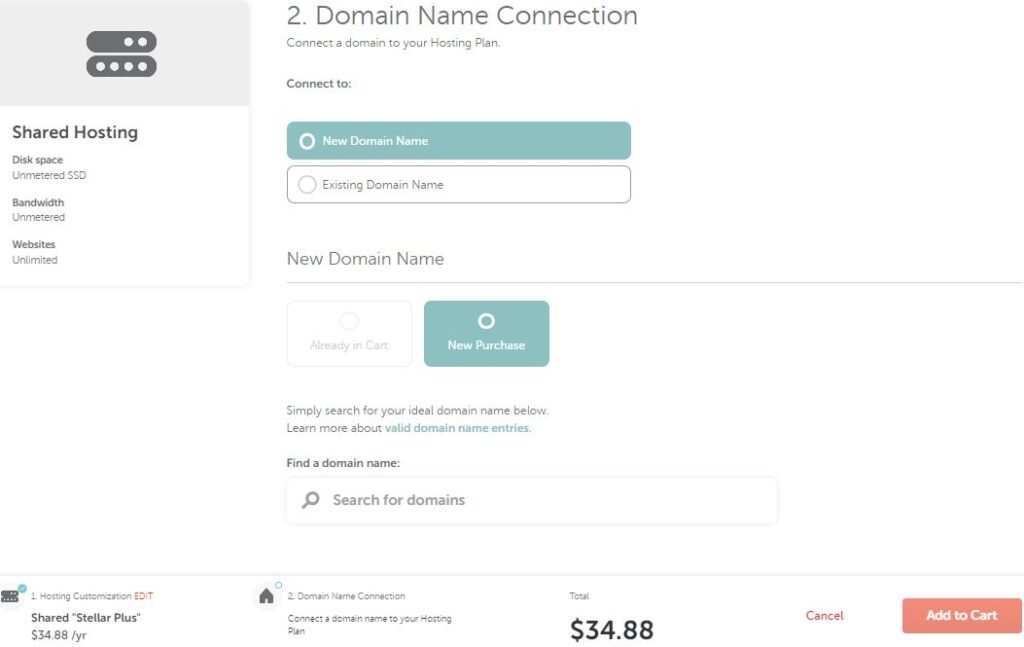
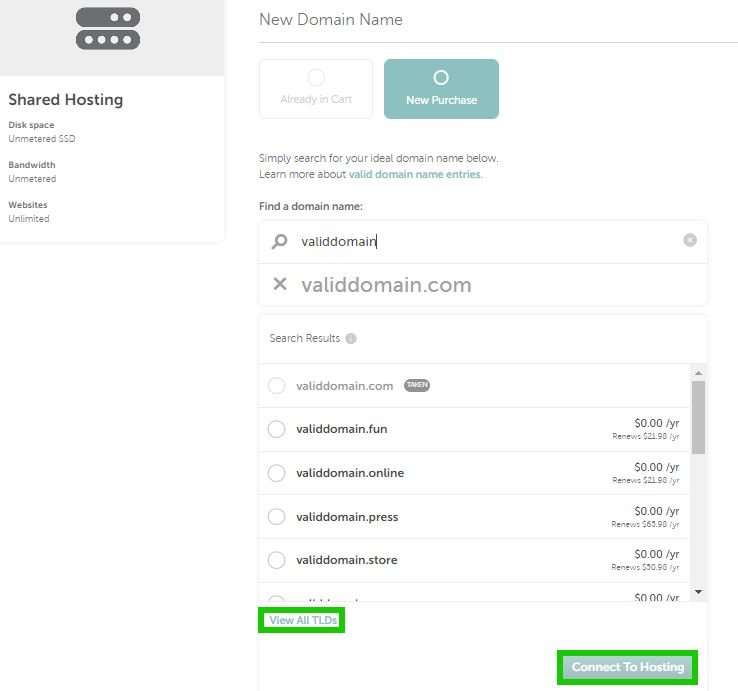
If you don’t already have a domain name, now is the time to pick one. Namecheap allows you to either register a new domain or connect an existing domain that you already own. If you are registering a new domain, simply type it into the search field, and Namecheap will show you the available options. Once you’ve found the perfect domain name, click Connect to Hosting to move forward.
Step 6: Add Domain to Cart and Review Hosting Plan
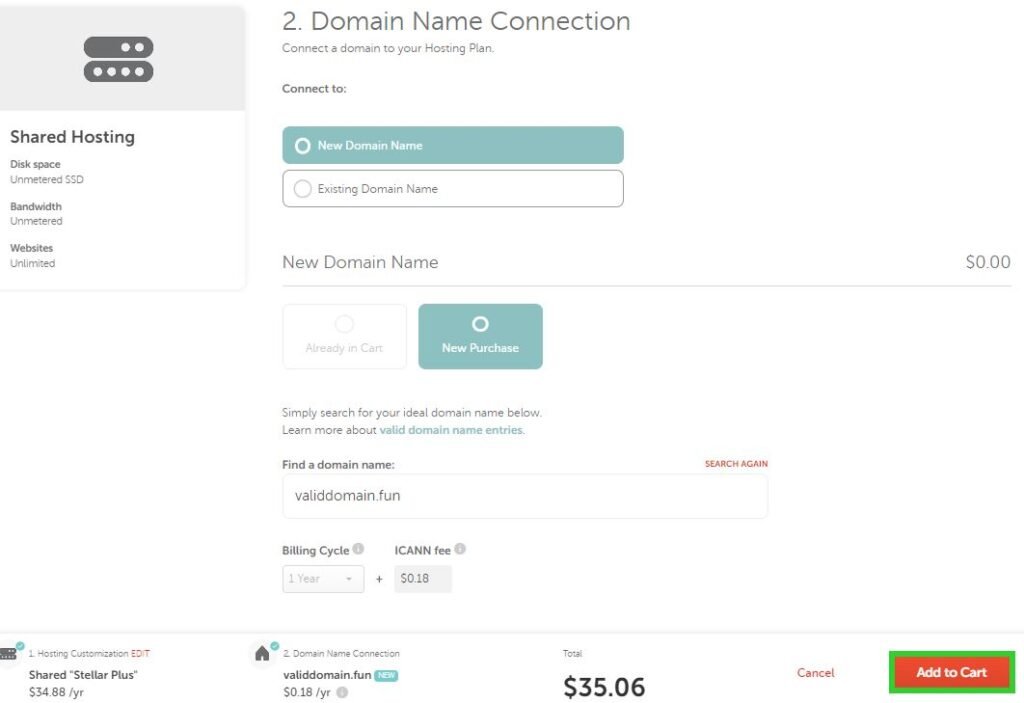
After choosing your domain, you’ll be asked to confirm your hosting plan and the domain name you’ve selected. If you want to adjust anything, you can go back and make changes. When satisfied, click on Add to Cart. This is your opportunity to double-check everything before moving to checkout.
Step 7: Proceed to Checkout
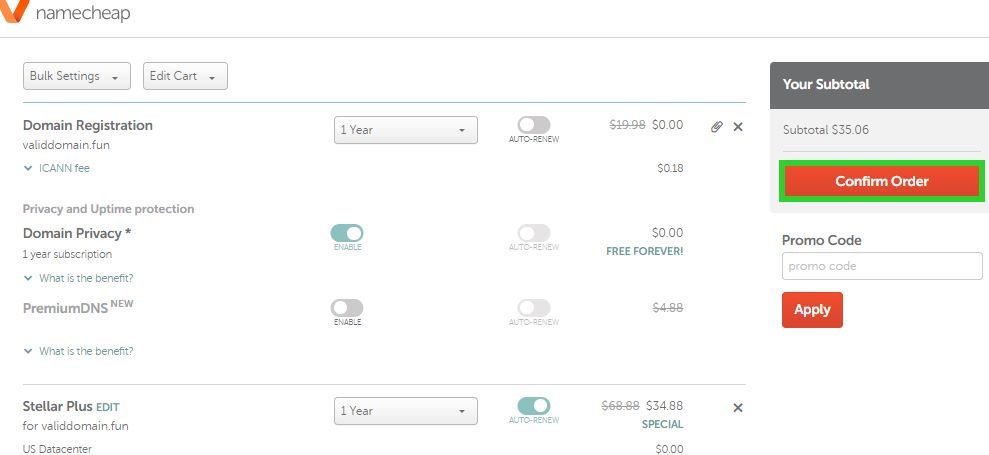
Once your domain and hosting plan are added to the cart, proceed to checkout. Namecheap gives you the option to apply any discounts or promo codes at this stage. After reviewing your order, click on Confirm Order.
Step 8: Choose a Payment Method

Namecheap supports a variety of payment methods, including Credit Card, PayPal, and Account Funds. Select the payment method that is most convenient for you and enter your payment details to complete the purchase.
Step 9: Complete the Purchase
Once your payment is processed, Namecheap will activate your hosting plan and send you a Welcome Email with all the necessary details, including login credentials, server settings, and instructions on how to access your account.
Step 10: Access and Start Using Your Hosting
Upon receiving your welcome email, you can now log into your Namecheap hosting account. Depending on the type of hosting plan you selected, you’ll have various tools at your disposal, such as cPanel or other management platforms, to set up and manage your website.
Namecheap Hosting Plans Comparison
To help you make an informed choice, here’s a quick comparison of Namecheap’s most popular hosting plans:
| Hosting Plan | Monthly Price | Key Features |
| Shared Hosting | $1.58 | 20 GB SSD storage, Free SSL, Free CDN, 1 Website |
| VPS Hosting | $6.88 | 2 GB RAM, 30 GB SSD, 2 TB Bandwidth, Full Root Access |
| Dedicated Hosting | $48.88 | 4 GB RAM, 500 GB SSD, 5 TB Bandwidth, Full Root Access |
Both Hostinger and Namecheap are highly regarded hosting providers, but Hostinger is known for its lower prices and solid performance. On the other hand, Namecheap excels in domain registration and providing solid support for website owners who prioritize domain management. It all depends on what you value most in your hosting provider.
Yes, Namecheap allows customers to pay for hosting on a monthly basis, giving you more flexibility. However, opting for an annual or multi-year plan can often result in better savings compared to monthly payments.
SiteGround is a major competitor of Namecheap, particularly in terms of customer support and performance features like SSD storage and advanced server technologies. SiteGrou
nd is particularly favored for its WordPress hosting services.
How to Buy Hosting from SiteGround 2025
Conclusion
Now you know exactly how to buy hosting from Namecheap in 2025. Whether you’re looking for shared hosting for a personal blog or a more robust solution like VPS or dedicated hosting for your business, Namecheap offers an array of reliable options. By following this guide, you can ensure a smooth and hassle-free purchasing experience.
As always, take your time in reviewing the different hosting plans and domains. Make sure the option you choose aligns with your website’s goals and budget. If you need any help along the way, Namecheap’s customer support is readily available to assist. Happy hosting!
